-
Log in to the website.
-
Navigate to the Page you want to edit.
-
Hover over Edit and press Edit This Page.
NOTE: You are now in Edit Mode. Keep in mind that you cannot navigate throughout your website using your website’s navigation until you exit Edit Mode.
-
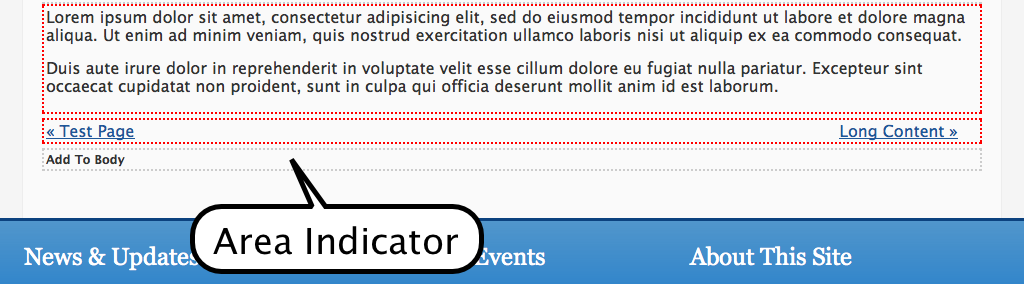
At the bottom of an Area, you’ll see the Area Indicator.
The Area Indicator has light gray dotted lines around it, and contains text like Add To [Area Name].
NOTE: [Area Name] will change depending upon the name of the Area, of course. For instance, you may see any (or none!) of the following:
- Add To Body (shown in the figure)
- Add To Sidebar
- Add To Footer
-
Click on the Area Indicator and choose Add Block from the menu that appears.
-
The Add Block panel will appear, displaying a list of Blocks.
-
To see more information about the Blocks:
-
Press the Help icon (the life preserver) in the upper right of the panel.
-
Use the Search Box to find the Block you want.
-
-
Select a Block by clicking on it.
-
The Block’s editor will now open in another panel.
NOTE: Different kinds of Blocks will have different fields to edit.
-
Edit the fields for the Block’s editor.
-
Press Add.